Subject 13 walkthrough
About this walkthrough
This is a complete walkthrough for Subject 13.
Using this walkthrough will get you through the game, but may spoil the game and fun of exploring.
Items which can be picked up as inventory items and items which can be constructed by combining or using other items are written with bold text for emphasis.
Chapter 1
When you begin the game first you will see a cutscene showing a car going underwater and later showing a man being underwater. When you wake up, you are in some kind of a chamber and a voice is calling you, and addressing you as "Subject 13". You will have conversation options to respond at times, but whatever you choose during the conversations won't have any effect on the gameplay, every conversation tree during the game will lead to the very same outcome. Some choices may tell more about the background events than others, but that's the only difference.
Soon you are free to explore your surroundings in the first person mode. Rotate view to the right and see there is a red button. Push the red button to activate a console that will be visible on the left side, so rotate the view to the left. Get a close-up view with the magnifying glass and then move the slider in front of the screen to the right. This will reveal an image with two faces and numbers below them. Using these numbers you can choose which character design you use to play the game. Whatever you choose, it won't have any effect on the gameplay. To have the default character, remember the code 03-99. To use the alternative design, which is based on a high-level Kickstarter backer, remember the code 19-12.
 Choose your character.
Exit the close-up view and rotate the view a little to the right to see a keybad. Using the close-up view, type in the code of your choice. A door in front of you will open and you can exit the chamber and start exploring. When you exit, the view changes from the first person to third person view.
See a computer at the very front of the view, with a stool right left from it. There is an envelope on the stool. Go to the close-up view of the stool and then the envelope, and open the envelope. There is a card inside the envelope, pick it up by pulling it as shown by the arrow, and then click it on the inventory to examine it closely. Rotate the card around to find a key. Exit the close-up, and while still in the stool close-up view, rotate view to the right to see a yellow testimony on the floor. Picking it up is optional, as is the case with all testimonies which are not automatically found, but testimonies will provide much background information and even helpful hints, so it is highly advisable to pick them up. This testimony is identified as "15 September 2006".
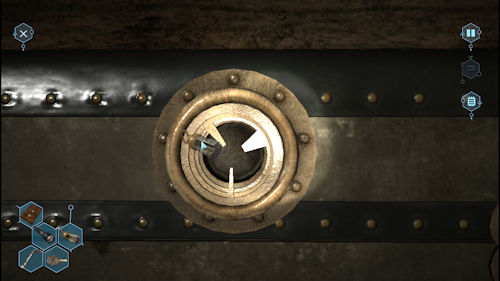
Close-by is a computer console desk. If you look carefully, you can see a yellow testimony lying on the desk. This testimony is identified as "29 October 2010". Walk to the right side of the room where a door is located. There is a lock beside the wall, go to the close-up view to see the lock. Take the key from the inventory and use it on the lock and then turn the key as indicated by the assisting arrow symbol. A keypad will appear with a minigame. The game is a variant of tic-tac-toe, but in this game you need to push keys to lit six lights, without forming a single line.
The correct answer is to choose two corners which are diagonally on the opposite ends, and have three lights on both corners. So, for instance you push the first and second buttons on the first row, the first and third buttons on the second row, and second and third buttons on the third row. The door will open and you can use it to enter the next chapter.
 One more button to push, and the door will open.
Chapter 2
When you enter the new area you will have a brief conversation with the mysterious voice. After the conversation you can start exploring the area. There is a huge signaling platform in the middle of the room. Go stand in the middle of it and use the close-up view. There is a latch with metallic bars preventing it from opening. Move the metal bars to the side. An audible click will tell you when a bar has been pushed far enough. Once you have moved both bars, the latch will open and a yellow box will rise. Rotate the view to the right and notice a small sliding hatch with the HexaCorp logo on it. Pull it down to reveal a red button, and then push the red button.
The lid opens, and then you can rotate the view to the left to see what is inside the box. There is a handset, pick it up. You will automatically pick up a testimony that is identified as "15 April 2002". Exit the close-up view and next move to the left side of the room to find a large metal container. Use the close-up view and raise the lock hinge that is closed, you will easily recognise the lock hinge from the HexaCorp logo. Pull down the lid and a puzzle game will appear. The goal here is to form lines of three similar tiles. It doesn't matter where or how those lines are made, as long as they are of similar tiles. When three similar tiles form a line, they will light up. There are many possible ways to solve this puzzle.
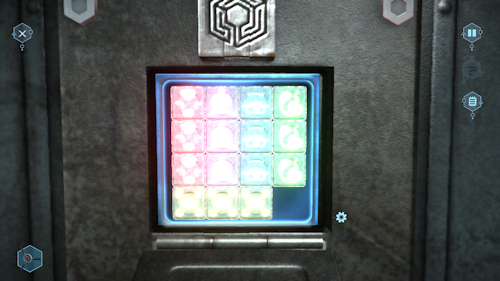 One possible solution for the slider puzzle.
When the puzzle is solved, the container opens. Exit the close-up view and look at the top of the container. There is a globe shape visible, pull down the left and right sides of if to find a lever, and pick it up. Rotate the view a little to the right to find a testimony. This testimony is identified as "Memo 00285 (10/07/2010)".
Next notice there is a door and an old closet on the right side of the room. Use close-up view on the closet, then take the handset from the inventory and use it on the closet. Turn the handle to open the door. There is a small white button on the right side inside the closet, push it to open a shelf puzzle. The puzzle is easy to solve, all that needs to be done is to match the colours on the shelves to those on the sides by moving the shelves up and down. When the shelves are in the right places, a door at the bottom of the closet will open and a book of spells, called "Book of 100" is inside. Pick up the book and exit the close-up view.
Click on the book in the inventory to examine it, if you rotate it, you will find a combination lock that needs to be opened. There are two knobs with symbols on them, when the combination lock has the correct symbols in place, the book will open. When the correct combination is found, the red slider should move when pulling it. The best way to solve this puzzle is to have the knob on the left stay where it is, and simply turn the right knob a full circle stopping with every symbol to see if the book will unlock. If not, then move the left knob one symbol ahead, and do another full circle with the right knob. And so on.
[Author's note: There are some walkthroughs describing how to find hints to know the correct combination. I couldn't find any in my game... Whether this is because I didn't know how to find it, or if there are some bugs with that, as the game is buggy at times, I can't tell. In any case, solving the puzzle using brute force won't take longer than few minutes, as there are only two knobs to manipulate. Mathematically there are two knobs with eight symbols on each, so the maximum number of combinations is 64.]
When the lock on the book cover finally moves, pull it back and turn the book cover to open the book. A small part of the book spine opens up too revealing the number 13. Turn the book so that you can see the title page. The word "100" is written upside down, so grab it and turn it the right way. Now the rest of the book spine opens up too, and there is a mathematical puzzle. There are two sliders with numbers. The goal of this puzzle is to move the upper and lower sliders so that they add up to the correct sum. The book name is a hint, the sum should be 100. And in case you can't do the math here, the correct solution is: 38 + 62.
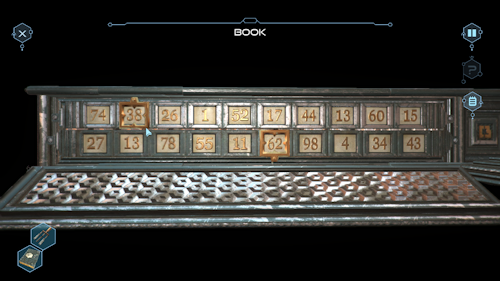 The correct numbers for the Book of 100.
This will open a secret compartment within the book to reveal a socket wrench and a testimony, pick at least the socket wrench up, the testimony is optional as always. This testimony is identified as "05 September 2009".
Go back to the main room view and get a close-up of the box next to the door on the right side. There is a sliding cover with a yellow arrow, make it come down by using the socket wrench on the screws that hold the cover in place and then pulling it down. Behind the cover is an attachment point for a lever, so basically you should take the lever from the inventory and place it there. However, if you try to do that, you will find that it doesn't work. Click on the lever to get a close-up view of it. Rotate the lever so that you can see the fork-like attachment points. They are not pointing in the same direction, as two of them are in a horizontal position instead of the vertical position which the middle one has. So, make the outer ones point the same way as the middle one by turning them. Then, exit the close-up, put the lever in the wall and pull the lever to open the door.
Enter through the door, and there will be a brief vision or visitation to see. When it is over, you can explore this area. There are a lot of hotspots in this room, but not much can be done as of yet, as there are some items that need to be picked up first. Examining things in this room will give some hints as to what to look for in the next room though. Go through this room and climb the stairs at the back. They will lead to a dormitory that has many things to do. There are many hotspots in this room and since they are not labeled automatically, it may be a bit tricky at times to know which hotspot the pointer is on. Using the eye icon will reveal this of course, if there are any unclear situations.
There are many places which might house useful items such as bunks, drawers, a chest and so on. The real place to look for, however, is the metal closet that may be a bit hard to point at as there are so many surrounding hotspots. View the metal closet in the close-up view. Open the closet doors and then the two small compartment doors on both sides inside the closet. There is a piece of concrete on the top shelf on the right side, move it out of the way. Under it there is a swipe card, which you should pick up. In the same place, but on the left side of the closet, you can find a testimony. This testimony is identified as "Report from 24 October 2010". The next thing to find feels almost like a hidden object game, as it is somewhat hard to see. There is a helmet on top of the closet, on the right side. Rotate the view either to the right to see it very clearly, or alternatively down to get a small glimpse of that, just enough to have an interactable hotspot visible. Pick up the helmet, and while you pick it up you will also automatically pick up a testimony. This testimony is identified as "10 November 2010". Exit the close-up view.
Next go to the sink and try the water tap, it's not working, so have a close-up view of the pipes running under the sink and have a close-up of the big red handle that controls the water flow. Turn it to have the water available for the sink. Exit the close-ups and look at the sink. It is recommended to rotate the view to see the sink from a top-down angle. Use the water tap to have the water running, and afterwards use the helmet on the sink. Now you should have a helmet full of water. Notice the yellow testimony on the sink, which you may pick up if you want. This testimony is identified as "22 November 2007". Leave the sink and exit the room to the previous room.
Look at the three doors on the back wall, and have a close-up view of the lock on the leftmost door. It's an electric lock with a command box beside it. Have a close-up view of the command box to start a minigame puzzle. The goal of the game is to have the blue piece with the  Using the swipe card after solving the slider puzzle.hexagon symbol to move left, so that the hexagon symbol on the piece will match the hexagon symbol on the panel. To do this, simply move the blue piece down first. Then move the red piece above it as down as it goes, then move the similar red piece from the left side all the way to right side. Now move the red piece that is blocking the hexagon in the corner up, so that the blue piece can slide to the left. The game will automatically exit the close-up view, but if you go back to it, you can see a card slot under the game, so take the swipe card and use it on the card slot. The door will open and you can see a ladder in the storage, pick the ladder up. You will also automatically pick up a testimony. This testimony is identified as "13 September 2004". Exit the close-up view.
With the ladder, you can access the second floor of the storage. The fireman's ladder must first be extended though, so have a look at the ladder. Notice the locking screw on the ladder that is marked with yellow and black stripes. Take the socket wrench and use it on the marked area to unlock the ladder and then turn the striped metal aside. Next it is a good idea to rotate the ladder so that it will be easier to pull the moving part to extend the ladder to full height. Use the extended ladder against the wall on the right where you can see an open access on the second floor. Use magnifying glass icon on the second floor, which a bit confusingly will take you to the second floor, although you only see a close-up view of a big green box, no surroundings or climbing animation.
Have a close-up view of the box. There is a similar slider puzzle than the one on the storage door, except a bit more complicated. The goal of the minigame puzzle is the same, to have the hexagon on the blue piece and the hexagon on the panel to match. First, move the red horizontal piece to the left. This will allow the red vertical piece to move down, which in turn enables the blue piece to move all the way to the right. Next move the horizontal red piece up as far as you can, which allows the two red vertical pieces to move left. Now all that remains is to pull the blue piece down so that the hexagons match. The green box will open, and you can have a close-up view of what's inside. Pick up the weird object. Before you leave rotate the view a bit to the left, where you can barely see a testimony, which you can also pick up. This testimony is identified as "Memo 00303 (09/10/2010)". Exit the close-up view.
Go to the machine of some kind that is located on the right side of the room and use a close-up view to examine it. In the centre is number 13, there is also a red button and a small hatch next to it. Open the hatch. Take the helmet with water and pour the water into the hatch. The measuring bar next to the number 13 will rise, and on the right side a panel will unfold revealing another slider puzzle. Have a close-up view of the puzzle to start solving it. The goal of this puzzle is the same as before, to match the hexagons. This puzzle seems relatively easy at first glance, as the blue piece only needs to move up one step, however the shape of the red pieces makes this move very challenging, as every piece needs to be moved at least once. Another slider puzzle solved.
One possible solotion is as follows: move the two red pieces in the lower left corner one more step to the left. Move the red piece on the lower right corner to the left. Now move the horizontal red piece, which is next to the blue piece on the right side, first to the right, and then down. Now there is some space to move the two red pieces on the top right corner one step down. After doing this, the red piece that is blocking the hexagon symbol can also be moved to the right as far as it can go. Now the hexagon area is free to move onto, so push the blue piece up to make the hexagons match.
Another hatch above the puzzle will open revealing an artifact, pick it up. While still in the close-up view, rotate the view to the left. On the left side of the machine is a testimony. This testimony is identified as "Report from 08 February 2007". Exit the close-up view. Go back to the first room in this chapter by exiting the current room through the door on the left.
Notice the red light at the back wall of the room. There's a device hidden in the recess. Go to the close-up view, and then even more detailed close-up view of the hole with the yellow stripes in front of it. Click on the artifact that looks like a bottom piece, then pull the other piece onto the piece being examined, and rotate them so that the pieces will fit together. Now you have one complete artifact in the inventory, and this artifact should be placed into the hole you have in front of you. A door to a previously locked up area opens, go through it to proceed further.
Have a close-up view of the console on the left side of the room. After a cutscene you can operate the console which has five switches and indicator gauges. Flipping a switch will make some gauges move to the red area and some gauges go to zero. You need to find a combination that will have all gauges in the red area. The most simple solution to this is simply ignore the first switch on the left, and flip all the others. After doing that, a panel with a puzzle will open in front of the gauges.
The goal of this puzzle is to have all the lights on the panel lit up. The way the puzzle works is that when you hit a button, the status of all lights on top, down, left and right side of the button will inverse - the buttons which are not lit will light up, and the ones which are lit will be turned off. This puzzle is randomised, so each playthrough can have a different solution, but as a general guideline it should be remembered that while each button operates the same way in theory, the corner buttons will affect only two other lights. This should be the key to the solution, to have most of lights lit, and then have some corner where it is convenient to change the lights so that they will all be lit up. Remember to have the corner light lit up first, as pushing a button won't change status of the button being pushed.
 Achieving this situation should be the goal, the solution is here only one more click.
When the puzzle is completed, you will see a beam of light appearing. In order to use it for the upcoming puzzle, go back to the console, and examine the right side of it in a close-up view. There is a blue prism that you can pick up, and picking it up will automatically pick up another testimony. This testimony is identified as "Report from 18 February 2007". Exit the close-up view and return to the normal room view.
See how the layout of the room is like. There is a projector in the middle, a beam of light is coming from the left side of the ceiling, there are three reflectors, and at the bottom in line with the projector is a stand with an empty space to hold an object. The goal here is to adjust the beam of light so that it will end up in the projector. The first thing to do is adjusting the reflectors. They can be turned a bit sideways, and erected to stand taller if needed. The angle of the reflector can also be manipulated.
First go to the reflector that is on the right, under the beam of light. Erect it so that it will catch the beam of light, and then turn it to make the beam be reflected to the left side of the room and hit the other reflector. Then make the beam be reflected to the other reflector on the right side. Adjust the height and angle of the last reflector so that it will hit the centre of the stand. If needed, adjust all three reflectors to get the beam into the right place. When successful, take the prism from the inventory and place it in the middle of the stand. If everything is in the right place, there will be a hexagon reflected on the closed door.
 Beam correctly reflected, placing the prism on the stand.
Next go to the projector and notice a closed hatch. Take the socket wrench and use it to open the hatch on the projector. Pull the hatch down to see a gear mechanism inside. Notice the pattern on the wall. The goal is to move the gears so that the reflected shapes will match those on the wall. The tricky part is that the image controlled by the gear closest to the wall can move independently, whereas the next one gear will move two images, and the last gear will move all three. So start from the one that moves all, and make it match the wall pattern. Then operate the gear that moves the inner images, and finally make the last one match.
The door will open, and you can ask what you want from the mysterious voice. You can now enter the next chapter. There are still two more testimonies which can be picked up, but as before, are not cruicially needed. The first remaining testimony can be found inside the projector, under the gears. This testimony is identified as "Memo 00301 (03/10/2010)". The last remaining testimony is behind the pipes on the left side of the room. This testimony is identified as "15 March 2008".
Now there's nothing left to do in this area, so go through the door and start the next chapter.
Chapter 3
You come out of the facility to an outdoor area. If you want to, move to the left side of the screen and right next to the big rock you can find a testimony. This testimony is identified as "10 October 2009". Notice there is something on the very left of the screen. It's an old boat, and if you look at it in the close-up view, there are actually many things in that area to explore.
First on the right side you find a crate in a sorry state. Examine it in a close-up view, and you will see that you can move the planks on top of the crate. Move them aside, and underneath is an empty jar which you can pick up. Exit the close-up view and look a bit to the right. There's an opening in the rock, have a close-up view of that. Inside the opening is a red vanity case. Pick it up, exit the close-up, and rotate view a little more to the right to see the boat better. Examine the boat in the close-up view, and find a key that is inside the boat. Pick up the key and exit the close-up view. Look carefully at the tree which is in front of the boat. There is some fungus growing on it. In order to pick the mushroom up, you should have a close-up view of it, once you have taken it, return to the normal view where you can see the entire area.
Next you can try to walk along the main road, to find that it is blocked by an angry bear. The next thing that needs to be done is to find a way to get rid of the bear. Notice a passage between the trees which is a little to the right from the main road. You can go there and explore if you want, but before you can accomplish what needs to be done in that area, look at the carnivorous plant first which you can find right next to the building. Examine the plant in the close-up view.
The plant is a pitcher plant with several pitfall traps hanging from it. When you click on them, they may or may not open, depending on whether you are trying them in the right order or not. The ultimate goal here is to find a sequence, in which you click each and every one of the traps once to have them all opened. The problem is that there is only one possible sequence, and it is randomised. If you click a trap that is not the right one, it will close all the traps that have been opened until that point, and you need to start all over again. This puzzle can only be solved with trial and error (and maybe with the autosolve option that can only be used once in the game). The puzzle is not very difficult, if you are methodological about solving it.
Notice that one pitfall trap is much larger than the others and also has a reddish colour, while the others are mainly green. The red one is the 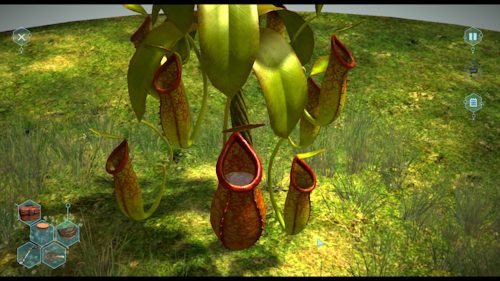 Use the large, red trap that will be the last to open as a landmark.last one to open, so it makes a perfect landmark for identifying the other ones. It is recommendable to assign some "hour value" to the red trap. For instance, if you think of it as being in the six o'clock direction, the opposite side would be in the twelve o'clock direction and so on. Also take note from the positions that the traps have. Some are higher and some are lower. How you define them, is your preference. "Up" and "down" are easy and descriptive, but you can also use some other methods. For instance, if you are familiar with using 12-hour system, you can say that the upper ones are AM, and the lower ones are PM, in which case the last red one would be in the 6PM position and the others something else accordingly. Whichever method you use, the goal remains the same, and since there's no way to help with right the sequence other than saying that it's all random except for the last one, you just have to solve it on your own.
Once you have all the pitfall traps open, you will see that the red one is full of water. You should get some of it in the jar that is in the inventory. To do that, you need to open the jar. Examine the jar. If you try to open the lid, it won't move. Turn the jar upside down in the inventory view. Hit the bottom of the jar three times to loosen the lid. When you have done this, you can open the jar by turning the lid. Use the jar on the big pitfall trap to get some water. Leave the plant, and now you can go to the small passage between the trees close to the plant.
You will come to an area which has a small cave that is blocked by plant growth. Rotate the view to the left. There is a rock which can be moved, do so, and underneath you will find a wooden disc which you should pick up. Examine the wooden disc in the inventory. There are some words written on it, so try to rotate the disc parts so that you can read the message. The words form a riddle of some kind, where each sentence seems to begin with a colour. Now turn the disc around. There is a childish painting on the other side, with a house and a rainbow. These hints will help you open the vanity case that you are carrying in the inventory.
 The riddle on the wooden disc.
If you examine the vanity case in the inventory, you will see a lock with a numeric passcode. The hints found on the disc will tell which numbers open the lock. Look at the riddle and notice the order of appearance for the colours. There are four colours mentioned just like there are four digits in the passcode. The one mentioned in the first sentence is the hint for the first digit, the one mentioned in the second sentence is the hint for the second digit, and so on. Take note of the order of colours that the rainbow picture had on it other side of the disc. The first colour is number 1, the second colour is number 2, and so on. The right passcode will therefore be found by looking for the corresponding ordinal number for each of the colours mentioned in the riddle.
 The image on the wooden disc.
In case you don't want to solve it yourself, or can't find the correct combination, the answer is 6237. Use this code on the lock and the it will be unlocked. Now you can open the vanity case by pulling down the lock and then raising the cover. Under the cover is another puzzle.
The goal of this puzzle is similar to those before. You should rearrange the pieces so that the white circular shape is under the circular hole on the right. The biggest challenge here is that the white circular shape is actually part of the biggest piece, being only in a corner of the bigger blue piece. So in order to move the biggest piece anywhere, there needs to be always at least two free spaces. As with other similar puzzles, there can be many ways to solve it, as long as the circular shapes match in the end.
First, move the rightmost yellow piece down and to the right so that it is in between the two white pieces. Then move the lower white piece left and all the way up. Lower of the two yellow pieces on the left to the right and then up. Pink piece from the left side to the right side. Leftmost yellow piece all the way down. Leftmost white piece to the left and down. Upper pink piece to the right. Now you get to move the blue piece for the first time, which goes up for the time being.
Next the leftmost yellow piece all the way to the left. White piece that can be moved one step down and then left. Lower pink piece to the left as far as possible. Both yellow pieces on the right one step down. Now the white piece has a nice "corridor" to move along, first right, then up, and then as far to the right as possible. Next the leftmost yellow piece in the right bottom corner goes up and left. Lower white piece to the left, and the yellow piece under it up. Lower pink piece to the right side. The yellow piece that can be moved down and left. Lower pink piece one step right, and the yellow piece on the right one step down.
Now the lower white piece can move to the right side and lower pink piece all the way up below another pink piece. The yellow piece on the right to the left where the other yellow pieces are. The lower white piece all the way down and one step left, followed by the other white piece also all the way down. Both pink pieces move, the lower to the right and one step down, the upper to the right. Now the blue piece can move again one step right and one step closer to its goal.
All the yellow pieces move now, first the leftmost moves up, and the other two to the left one step each. Both white pieces move too, the first one to the left and up, the second one to the left. Both pink pieces come down to the lower right corner. Now the blue piece can advance two step to the right. All that remains to do is move the rightmost yellow piece all the way up, and then the upper white piece either one or two steps up (it doesn't matter how far it goes). Now the upper pink piece can move left, and the blue piece can come down where right where it is supposed to end up. Once the rectangular shapes match, the vanity case opens up. Inside is a perfume bottle, pick it up. Exit the close-up view.
 The vanity case slider puzzle.
Use the jar on the mushroom, the goal is to use the jar to ignite the mushroom, note that this doesn't work if you try to use mushroom on the jar. Adjust the angle of the jar so that the beam of light hits the mushroom. After a while it will catch fire. Now you can use the burning mushroom to clear the vegetation that is blocking access to the cave. After the fire goes away, you have access to the cave with peppers and can pick up some chilies. Exit the cave and return to the path area.
Now examine the perfume bottle and notice you can open it by lifting the sprayer. Take the chilies and use them with the perfume bottle to create a pepper bomb. After doing that, you can simply walk along the road that was blocked by the bear before, you will automatically come to a new area after a short cutscene.
The beach area has many cottages and other things to explore. Some things can be accomplished in a different order than described here, but this is the most straightforward and involves least amount of wandering around. First go to the beach and on the right side of the cottage is a column of stones. When you examine it in the close-up view, you will notice that it has many rounded pieces on top of each other. Each piece has slightly different markings, and they can be rotated independently. The goal here is to make the lines match, however, it is impossible to find a perfect match, so what needs to be done is to find the closest possible match. So for instance, if there are five lines which could hypothetically meet lines on another stone piece, but it is impossible to match them all, trying to get three or four matches will suffice. To make this a bit easier, the two topmost pieces are matching perfectly when you begin the puzzle (provided that you haven't rotated them). A good strategy is to work your way from top to bottom.
 The parts correctly lined up.
When you have found the matches, the statue will split in the middle, the upper half will rise, and inside you will find a flashlight which you can pick up to get a lamp in your inventory. You will automatically pick up a testimony that is identified as "18 April 2006". Exit the close-up view to return to the beach. It is possible to visit cottages in any order, but as the lamp is needed in only one, go first to the middle cottage. When you enter it is dark, so examine the lamp in the inventory and move the switch make it lit. When you exit the inventory view, you will have enough light to explore the cottage.
First rotate view to the left to see an organ. Have a close-up view of it. Notice how some of the pipes seem to be longer and some shorter, so they are weirdly positioned. The goal here is to move the pipes around so that they all are lined up. There are places for ten pipes, but there are only nine of them. The rightmost place for a pipe can be used as a temporary position while moving the pipes around. Once you have them all in correct positions and lined up, a music box of some kind will become visible at the bottom. To make it play, use the crank handle on the right side of the organ, which is a bit hard to see.
When you play the organ, after a moment a hatch on the other side opens up revealing a notebook and a Boolean key code. Pick both of them up. You can now leave the organ if you want to, but there is still a testimony below the pipes, should you want to pick it up. This testimony is identified as "Report from 25 August 2009". Even if you don't pick testimonies up otherwise, this one contains a helpful hint for some of the following puzzles. Anyway, go to the right side of the room to find a trunk. Have a close-up look of it, and even more careful close-up of the special lock.
The goal here is not to find a key that opens the lock, as you already have it (the Boolean key code), but to arrange the lock so that it matches the key. Have a close-up view of the key in the inventory, and then return to examine the lock. Arrange it accordingly, but keep in mind that it needs to be a mirror image of what you saw in the key. When you have it right, you can insert the key and turn it to open the trunk. Inside the trunk is a fishing rod, pick it up. Exit the cottage.
 When the lock is correctly arranged, the key fits.
Next go to the leftmost cottage. You can't enter it, but there are some barrels which you can see in the close-up view. Move them to the side, and you will find an icebox that you can pick up. The icebox is locked, but you are carrying a key which you can use to open it. Before you can insert the key into the padlock, raise the metal that is protecting the lock. Turn the key, the lock will open, raise the lid of the icebox, and inside you will find a soda can and a bottle with a message. Pick the can up, pull the cork from the bottle and it will go to you inventory as well. Take the message from the bottle and it will appear as parchment paper in the inventory. Reading it will give you a subtle hint about what the objective in this area might be.
Go to the cottage on the right, you will enter a messy room. Notice the Buddha on the top left corner. Have a close-up view of it. It is a puzzle that has a total of six rotating circles, with symbols on them. The goal here is to rotate the symbols in such positions, that each has a matching  The highlighted area is a perfect match, the rest will be easy.symbol on the circle next to it. Doing this randomly might be waste of time, a better strategy is to focus on a group of four in any corner, for instance bottom left. Once you have found such positions where those four are matching with each other, it is easy to make the rest of them match as well. When everything is correct, the Buddha statue doors will open and you can pick up a candle. You will also automatically pick up a testimony that is identified as "31 July 2009". Exit the close-up view.
Before you leave the cabin, look at the floor. On the right side, there is a small painting on the floor, lying against a crate with two canisters. Turn the painting over to find a copper wire, pick it up. Now you have everything there is to pick up in the cottage, except for a testimony which is located on the left side, under the safe. This testimony that is identified as "Report from 03 March 2007". Exit the cottage and go to the beach.
There is a broken boat on the beach. If you can't see it, rotate the view down to show more of the waterline. Examine the boat in the close-up view. You can have a close-up view of the fishing net next to the boat, examine it to find a needle that is attached to. Pick up the needle and exit the close-up view. Now examine the front of the broken boat. Before the boat on the ground is a small fisherman's bag. Pick it up and you will also automatically pick up a testimony that is identified as "Memo 00121 (10/09/09)". Exit the close-up view.
Examine the bag in the inventory. You can try to pull the zipper to open it, but it is stuck and won't move. Use the candle on the bag to make the zipper move and then pull it to open the bag. Inside you will find an old fishing knife. It seems to be stuck too, so use some soda on the knife to have the blade come out, but you need to remember to open the soda can first. Even though it is not needed as of yet, you can use the knife to open the notebook if you want to. The content of the notebook will help in the next chapter, but is not yet the primary objective.
Have a close-up view of the pier in front of the rightmost cottage. There is a bucket of water there. The goal here is to use the bucket as a basis for a makeshift compass. There already is a needle in the inventory, but it is not yet magnetised. Open the lamp, and pull out the battery. To magnetise the needle, examine the socket wrench in the inventory. Take the copper wire and use it on the socket wrench. Next take the battery and use it on the socket wrench too. Now you have a device that can magnetise the needle. Take the needle, use it on the socket wrench, and when you pick it up again, it will be a magnetic needle in the inventory.
What is still missing is something to attach the magnetic needle to. Examine the cork in the inventory. Take the knife and use it on the cork. The knife will slice off a piece of cork, and you can simply use the magnetic needle on it. Then exit the inventory view and look at the bucket on the pier. Take the cork and place it in the bucket. The needle will soon be pointing to a direction somewhere.
Take the fishing rod, and throw it in the direction the compass was indicating. You won't get any fish, but you can pick up an anchor. Before leaving the pier, you can rotate the view to the right to find a testimony. This testimony that is identified as "09 September 2005". Exit the beach and go to the hills, the path is located in between two cottages.
When you get up to the hill, you will see a broken bridge. Before you try to cross to the other side, you may want to look down and find the final testimony in this chapter under a rock. This testimony that is identified as "Memo 00289 (09/08/10)". All that remains in this chapter is to go to the other side. Take the anchor from the inventory and use it on the other side of the broken bridge to throw it over there. Now you can leave the chapter and move forward.
Chapter 4
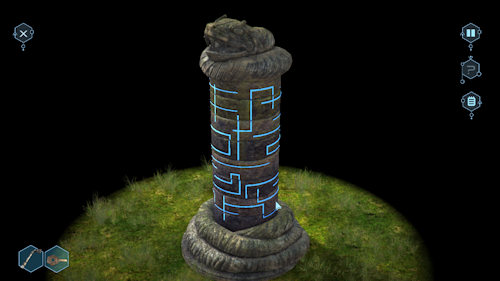
This is the final chapter and an outside of a temple. The goal in this area is to gain access to the temple, which for the time being is inaccessible. Look at the temple entrance. On the right side of the staircase is a rock plate that you can examine in a close-up view. You can pull down the panel to find another slider puzzle. The goal here is the same as it was with the previous ones where you needed to match similar pieces, except that this one is a bit harder, as there are more pieces to match. If you managed to solve the previous ones, this one shouldn't be a problem either.
 The location of the slider puzzle.
After you solve it, the view will automatically change and you find an orb labeled as eye, which you can pick up. You will also automatically pick up a testimony that is identified as "15 September 2006". Exit the close-up view and you get back to the previous puzzle view. Rotate the view a bit to the right, and behind a stone wall you will find another testimony. This testimony is identified as "26 October 2010".
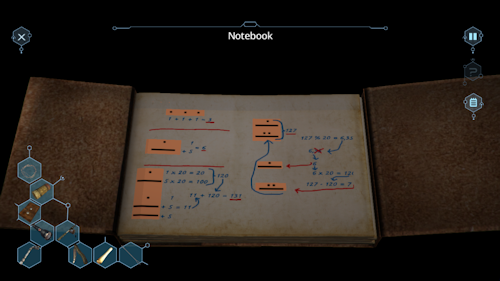
More important than the testimony is the icon on the wall which has an ear symbol. The temple entrance area has several of these, some have an ear symbol, while others have an eye symbol or a mouth symbol. These are all clues to be used with the monkey statue which is also outside the temple. The statue has three monkeys, being the usual three wise monkeys statue, "see no evil, hear no evil, speak no evil". To get the clues, use the eye over these symbol icons, and red visible markings will show up. Take some kind of notes of these, as they will all be needed to enter the temple. All markings will be basically the same, dots and lines in different kind of combinations. If you didn't read the contents of the notebook yet, this would be a good time.
 The mathematics in the notebook.
Before leaving the stairs, look around to find icons with a mouth and eys symbols too. Use the eye on them, just like you did with the one that had an ear symbol. Take note of the markings that will show up. From this point on, you should automatically use the eye whenever you see these symbols. (This walkthrough will tell you where to find them, but doesn't mention the eye anymore, unless needed in another puzzles.) Exit all close-up views, and return to normal view.
Go to the left side of the area, where you can see some vases. Have a close-up view. This is some kind of a tombstone with an empty cup-like formation. Use the eye on it and a blue trail will appear with a green button. Take the green button through the trail to the other end of it, and the tomb automatically opens. Pick up the eye again, and then rotate the view to see what is inside the tomb. There is a crank handle that you can pick up. You will also automatically pick up a testimony that is identified as "27 October 2010".
Before leaving the tomb, there are three icons here. One (mouth) is clearly visible on the left side on the wall. Another one (eye) can be found by pushing the vase on top of the tomb aside. The last one (ear) is hidden behind some plants on the wall, a litte bit up and right from the last one, but can be examined in the close-up view. Exit all close-up views, and return to normal view.
Now to find the last missing symbols markings. One (eye) is clearly visible at the front right of the temple area. Go to the monkey statue and rotate the view to see it from behind. At the base of the statue is a mouth symbol, and right next to it is a testimony. This testimony is identified as "19 January 2013".
There are no more symbols to be found, now all that needs to be done is some mathematics. If you studied the notebook you noticed that there are two kinds of symbols in the local numeric system: dots and lines. The number of symbols as well as their location (up or down) determines what number is in question. That may sound a bit confusing, but that's how all numeric systems work. For instance, in normal decimal system 1 means one and 0 means zero. But to have these in other contexts, will change the meaning. 10 is ten, while 01 is one with a leading zero, like in dates.
In this system, a dot can represent either 1 (down) or 20 (up). Similarly a line can represent either 5 (down) or 100 (up). What needs to be done, is first see what number each symbol marking found earlier actually meant. After that, those with the same symbols should be added up to get their sums. These sums are used to adjust the crank handle to fit into the corresponding monkey statue, and doing these for all three monkeys will open the door to the temple.
When you have done the mathematics, it is time to adjust the crank handle. Just like the numbering system, there are two dials on it, one to represent the upper range and one to represent the lower range. There are some numbers missing from the crank handle, but in case you need to have a number that the crank handle doesn't have, just put the dial arm to point in between the bigger and smaller number. For instance, there is no corresponding symbol for 3, but choosing the part between 2 and 4 acts as 3.
In case you can't do all the mathematics and crank handle adjustments, here are the correct answers, starting from the easiest calculation. The order of numbers follows the order in which the symbol markings were found in this walkthrough.
| Ear: | ||||
| 15 | + | 23 | = | 38 |
 Hidden numbers, ear. Hidden numbers, ear. |
+ |  Hidden numbers, ear. Hidden numbers, ear. |
= |  Crank handle dial positions. Crank handle dial positions. |
| Mouth: | ||||||
| 27 | + | 95 | + | 21 | = | 143 |
 Hidden numbers, mouth. Hidden numbers, mouth. |
+ |  Hidden numbers, mouth. Hidden numbers, mouth. |
+ |  Hidden numbers, mouth. Hidden numbers, mouth. |
= |  Crank handle dial positions. Crank handle dial positions. |
| Eye: | ||||||
| 32 | + | 132 | + | 121 | = | 349 |
 Hidden numbers, eye. Hidden numbers, eye. |
+ |  Hidden numbers, eye. Hidden numbers, eye. |
+ |  Hidden numbers, eye. Hidden numbers, eye. |
= |  Crank handle dial positions. Crank handle dial positions. |
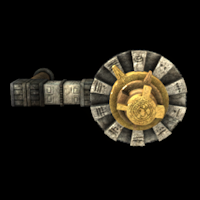
After making all the three wise monkeys rise up, the entire statue will turn towards the temple and the doors will open. After a brief discussion with Sophie you can enter the temple. In the middle of the temple is a weird looking set of blocks. There are four sides, and each side has a button that can be pushed. Pushing all four buttons in the correct order will make the blocks rise up, and form a platform. One of the buttons is almost impossible to see, as it is the same colour as the markings on the blocks. The three others are small, but can be found because of their colour. The right order is grey, pink, yellow, green. If you can find the first button, the rest will be easy.
 Approximate location of the hidden button.
Before going any further, this is a good time to pick up the last testimony, if you want to. It is on the floor, in front of the blocks on the right side. You may need to rotate the view in order to see it. This testimony is identified as "12 November 2010".
Now it is time for the puzzle that some players have described as frustratingly difficult, but which in fact is quite simple. Place the eye on top of the platform, where you can see a bowl-shaped area. This will activate a holographic display around the platform. What you see is a set of blue Minesweeper. squares. This is in fact a Minesweeper game, which only looks a bit different than usual. If you have played Minesweeper before, this follows exactly the same rules as the one that comes with the normal Windows installation.
For those who are unfamiliar with the game, or want to review to rules, there are mines placed under the blue squares. You can start anywhere you want to, and the starting point won't be a mine. From that point on, you need to be able to spot the squares which have mines and leave them as is, or in this variant mark them with green colour, and click on other squares which don't have mines to clear them. When you proceed in the game, some squares will have numbers on them, like 1, 2, 3 and so on. This means that the square with the number is touching as many squares with mines as the number indicates. So if there is a square that has number 1 on it, it is touching one, and only one, square that has a mine. That mine square can be on any side of the square, including diagonal directions.
That is how you can solve the puzzle. If you see a square that has a number 1 on it, and you know (or make a guess) which of its neighboring squares has the mine, you can safely click on all other eight neighboring squares, as those won't have any mines (unless you assumed the mine location wrongly). Here are bad news and good news about this puzzle. If you hit the mine, the puzzle will close and you need to take the eye orb and reinsert it to start again. The good news is that unlike the Windows Minesweeper, you don't need to start a completely new game. The mines and their positions will be the same. Your progress will be lost, meaning all squares you opened will be gone and need to be opened again, but all the squares that you tagged as mines will still be green. And the best part is that the square where you hit the mine will be marked red, so you can't make the same mistake with the same mine again.
This is also where some players haven't been observant. As you know the squares where you made a mistake, as those are in red, you will also know, at least approximately, the layout of the game. For instance, if there were a lot of squares with no mines on the left side of that square where you hit the mine, you can search that red square, and safely start from the left side of that square again. This of course assumes that you keep some kind of mental record on what you are doing. There is also a yellow vertical line with no squares which can be used to find the left and right sides of the puzzle, if needed.
 Subject 13 Minesweeper, notice the red square that was a mine!
Hypothetically it is possible to solve this puzzle completely randomly, as sooner or later you have hit all mines, after which you can simply click on all the other squares to clear it. Given that there are many mines and that restarting the puzzle is somewhat annoying (possibly to prevent random clicking...), this isn't a recommendable option, but if all else fails, and you want to finish the game, it is possible.
After solving the Minesweeper, there will be a short conversation followed by a cutscene which may answer some questions about the story, and raise some new questions. Whether you studied all testimonies or not may change the way you interpret the ending.
THE GAME IS FINISHED. CONGRATULATIONS!!!
Testimonies
You can collect testimonies during the game which may give some additional information about the gameworld and events which preceded the arrival of "Subject 13". Here is a complete list of testimonies and their approximate locations (some are picked up automatically).
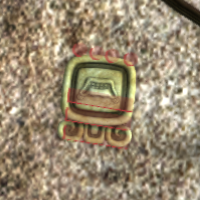
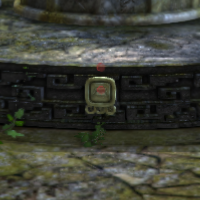
| Testimony | Screenshot | Description |
| 15 September 2006 | 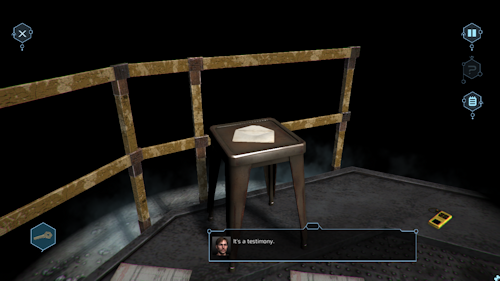 Testimony location. Testimony location. |
Chapter 1, near a stool. |
| 29 October 2010 | 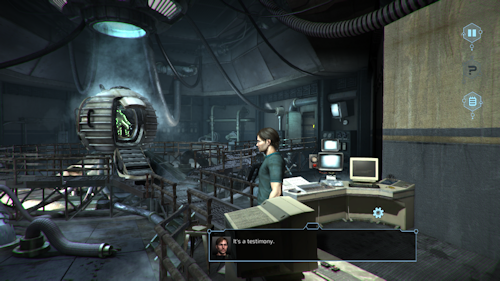 Testimony location. Testimony location. |
Chapter 1, on the desk. |
| 15 April 2002 |  Testimony location. Testimony location. |
Chapter 2, automatically picked up with the handset. |
| Memo 00285 (10/07/2010) | 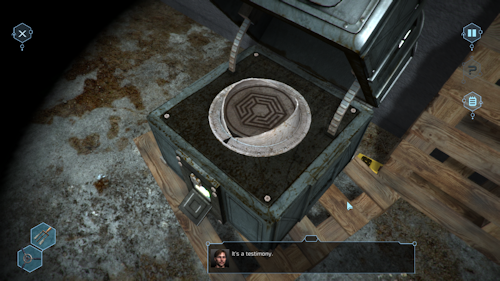 Testimony location. Testimony location. |
Chapter 2, behind a box. |
| 05 September 2009 |  Testimony location. Testimony location. |
Chapter 2, inside the book. |
| Report from 24 October 2010 |  Testimony location. Testimony location. |
Chapter 2, in the closet. |
| 10 November 2010 |  Testimony location. Testimony location. |
Chapter 2, automatically picked up with the helmet. |
| 22 November 2007 | 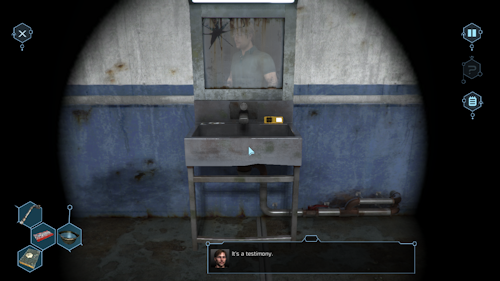 Testimony location. Testimony location. |
Chapter 2, on the sink. |
| 13 September 2004 |  Testimony location. Testimony location. |
Chapter 2, automatically picked up with the ladder. |
| Memo 00303 (09/10/2010) | 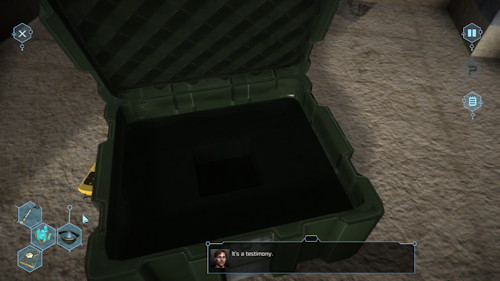 Testimony location. Testimony location. |
Chapter 2, behind the green box. |
| Report from 08 February 2007 |  Testimony location. Testimony location. |
Chapter 2, on the left side of the machine. |
| Report from 18 February 2007 | 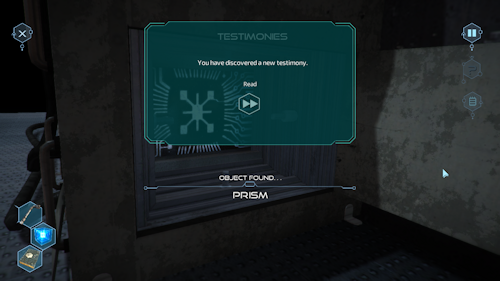 Testimony location. Testimony location. |
Chapter 2, automatically picked up with the prism. |
| Memo 00301 (03/10/2010) | 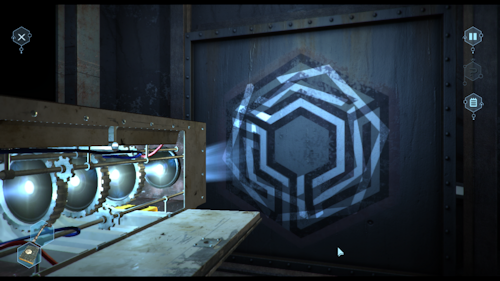 Testimony location. Testimony location. |
Chapter 2, inside the projector. |
| 15 March 2008 | 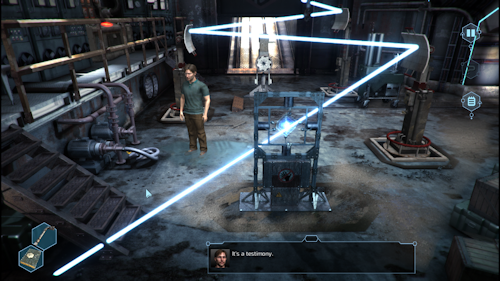 Testimony location. Testimony location. |
Chapter 2, behind pipes. |
| 10 October 2009 |  Testimony location. Testimony location. |
Chapter 3, next to a rock. |
| 18 April 2006 |  Testimony location. Testimony location. |
Chapter 3, automatically picked up with the lamp. |
| Report from 25 August 2009 |  Testimony location. Testimony location. |
Chapter 3, inside the organ. |
| 31 July 2009 |  Testimony location. Testimony location. |
Chapter 3, automatically picked up after solving the Buddha puzzle. |
| Report from 03 March 2007 |  Testimony location. Testimony location. |
Chapter 3, under the safe. |
| Memo 00121 (10/09/09) |  Testimony location. Testimony location. |
Chapter 3, automatically picked up with the bag. |
| 09 September 2005 |  Testimony location. Testimony location. |
Chapter 3, on the pier. |
| Memo 00289 (09/08/10) |  Testimony location. Testimony location. |
Chapter 3, near the broken bridge, under a rock. |
| 15 September 2006 |  Testimony location. Testimony location. |
Chapter 4, automatically picked up with the eye. |
| 26 October 2010 |  Testimony location. Testimony location. |
Chapter 4, behind a stone wall. |
| 27 October 2010 |  Testimony location. Testimony location. |
Chapter 4, automatically picked up with the crank handle. |
| 19 January 2013 |  Testimony location. Testimony location. |
Chapter 4, behind the monkey statue. |
| 12 November 2010 | 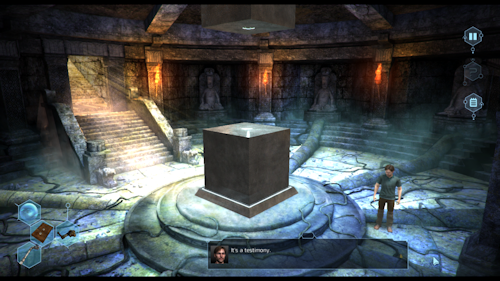 Testimony location. Testimony location. |
Chapter 4, inside the temple, on the floor. |